Adding your original filter
Add a very simple filter
Implementing new filter is one of the hardest task in lys. Before implementing new filter in lys, you have to lean how to use dask.array (https://docs.dask.org/en/stable/). Here we show very simple implementation of filter in lys.
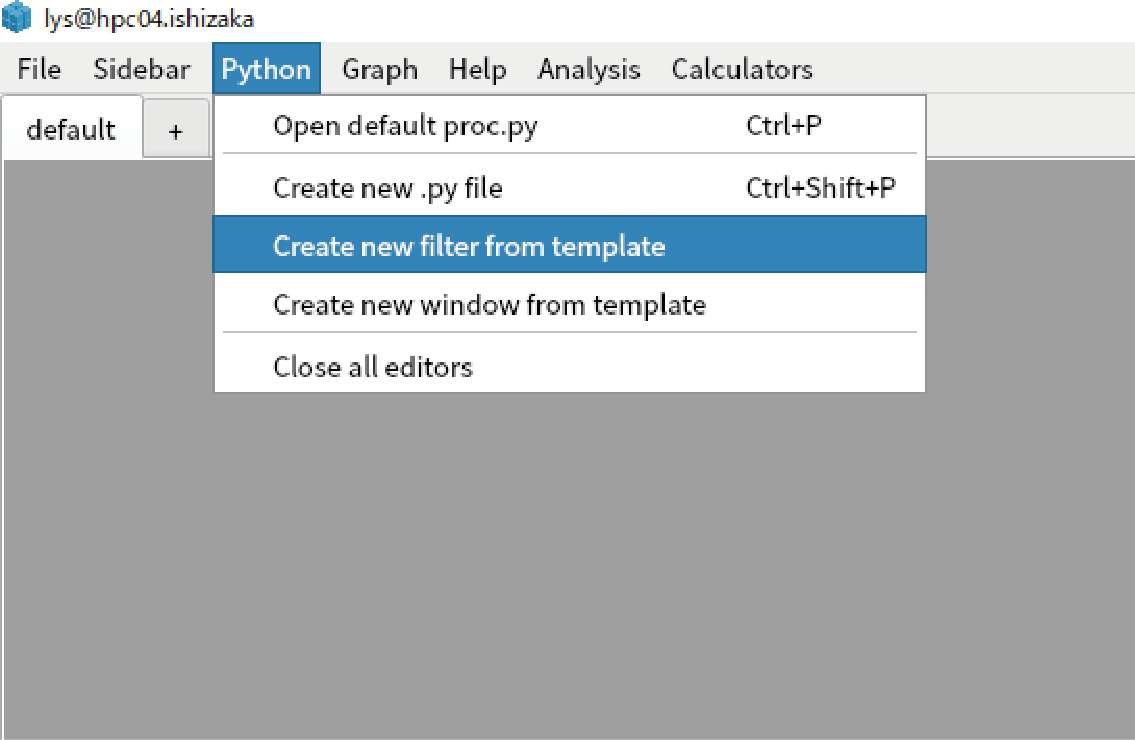
From the main menu, select “Python”-“Create new filter from template”. This code demonstrates how you should implement new filter.
You find the code below that create a filter in the opened .py file:
from lys import DaskWave
from lys.filters import FilterSettingBase, filterGUI, addFilter, FilterInterface

# We recommend users to import Qt widgets from llys, which is alias to Qt5 libraries (PyQt5 or PySide2)
from lys.Qt import QtWidgets

class FilterName(FilterInterface):
    def __init__(self, param1, param2):
        """ Save parameters """
        self._param1 = param1
        self._param2 = param2

    def _execute(self, wave, *args, **kwargs):
        """ execute and return result as DaskWave. This filter simply add param1 to data. """
        newData = wave.data + self._param1
        newAxes = wave.axes
        newNote = wave.note
        return DaskWave(newData, *newAxes, **newNote)

    def getParameters(self):
        """ Return dictionary. Keys must be consistent with arguments of __init__. """
        return {"param1": self._param1, "param2": self._param2}

    def getRelativeDimension(self):
        """ Return change of dimension. For example, when 2D data is changed to 3D, return 1 """
        return 0
You have to implement at least 3 methods: __init__, _execute, and getParameters.
Let’s start from _execute method. A instance of
lys.core.DaskWaveis given as the first argument, and you should returnlys.core.DaskWaveinstance as return value.The wave.data is a instance of dark.array. You can edit this array following the dask manner. In the present case, a float value (self._param1) is simply added:
newData = wave.data + self._param1
The wave.axes is a list of np.array that defines axes of data. You can modify axes if it is needed. In the present case, the original axes is not changed:
newAxes = wave.axes
The wave.note is a dictionary that defines meta data. You can add/delete arbitrary keys if it is needed. In the present case, the original not is used:
newNote = wave.note
Initialize DaskWave from newData, newAxes, and newNote. Note that axes and note should be passed as variable-length and keyword arguments:
return DaskWave(newData, *newAxes, **newNote)
9. Once you define _execute method, go to __init__ method. You have to take parameters as arguments. In the present case, only “param1” is needed, but param2 is also defined for demonstration. Do not forget to store parameters since it will be used in _execute method:
def __init__(self, param1, param2):
    """ Save parameters """
    self._param1 = param1
    self._param2 = param2
10. Next, go to getParameters method. This method should return parameters as dictionary. The keys of this dictionary should be consistent with __init__. In other words, the code below should work:
f1 = FilterName(1,2)
f2 = FilterName(**f1.getParameters())
11. It is noted that parameters should be primitive type such as int, float, str. The dictionary is saved as string like below:
f1 = FilterName(1,2)
filter_string = str(f1.getParameters()) # this string is used to save the filter by lys.
12. If the dimension of the DaskWave is changed by the filter, you have to change the return value of getRelativeDimension method. For example, the filter changes 2D array to 1D, you have to return -1:
def getRelativeDimension(self):
    return 0     # You have to change this value if needed. If you omit this method, 0 is returned.
13. It’s done! It is recommended to test the filter like this:
f = FilterName(1,2)
test_data =Wave([1,2,3])          # You can use Wave as test data.
result = f.execute(test_data)     # When you passed Wave to filter, it is translated to DaskWave automatically. The return value is also translated to Wave from DaskWave.
print(result.data)                # check if the result is correct.
Implement filter GUI
It is useless just implementing a filter like above because the filter is used from only CUI. However, when you implement filter GUI, it can be used in MultiCut. Therefore you can combine you own filter with powerfull analysis tools in MultiCut.
You see template for GUI in the latter half of the added code:
@filterGUI(FilterName)
class _FilterNameSetting(FilterSettingBase):
    def __init__(self, dimension):
        """
        __init__ must take an argument that indicate dimension of input data.
        Initialize widgets (see documentation of PyQt5 and PySide2) after calling super().__init__(dimension).
        """
        super().__init__(dimension)
        self._spin1 = QtWidgets.QSpinBox()
        self._spin2 = QtWidgets.QSpinBox()

        layout = QtWidgets.QVBoxLayout()
        layout.addWidget(self._spin1)
        layout.addWidget(self._spin2)

        self.setLayout(layout)

    def getParameters(self):
        """ Return dictionary. Keys must be consistent with arguments of FilterName.__init__. """
        return {"param1": self._spin1.value(), "param2": self._spin2.value()}

    def setParameters(self, param1, param2):
        """ Set widget values. Arguments should be consistent with FilterName.__init__. """
        self._spin1.setValue(param1)
        self._spin2.setValue(param2)
2. First of all, you have to implement __init__ method. The argument of this method should be only “dimension”. You have to call constructor of the superclass first:
def __init__(self, dimension):
    super().__init__(dimension)
Then you have to create user interface following Qt manner (You can find a lot of information when you google “PyQt GUI”):
self._spin1 = QtWidgets.QSpinBox()
self._spin2 = QtWidgets.QSpinBox()

layout = QtWidgets.QVBoxLayout()
layout.addWidget(self._spin1)
layout.addWidget(self._spin2)

self.setLayout(layout)
4. You should implement getParameters method. It should return dictionary whose keys are consistent with arguments of Filter class. In other words, the code like below should work:
gui = _FilterNameSetting(2)
#
# Users set parameters from GUI
#
f = FilterName(**gui.getParameters())
5. You should also implement setParameters method. The parameters should be reflected to GUI. The code like below should work:
gui1 = _FilterNameSetting(2)
#
# Users set parameters from GUI
#
gui2 = _FilterNameSetting(2)
gui2.setParameters(**gui1.getParameters())  # This line should duplicate the setting from gui1 to gui2.
Finally, you have to register a filter and a GUI to lys system by calling addFilter function:
addFilter(
    FilterName,                        # The filter class you implemented in previous section
    gui=_FilterNameSetting,            # The GUI class you implement in this section
    guiName="FilterName",              # This is shown in the MultiCut (arbitrary string)
    guiGroup="User Defined Filters"    # The filter is located below this group  (arbitrary string)
)
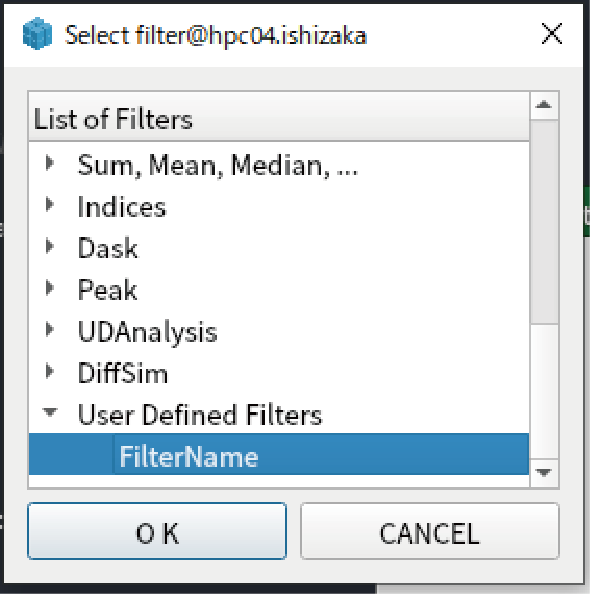
It’s done! You can find the new filter in the “Filter” tab in MultiCut.
Parallel computation by dask
For the implementation of the filter, it is recommended to read source code of pre-defined filters (filters module). In paricular, dask.array.ufunc is very often used to extend functions for 1D or 2D data to multi-dimensional array.
For your information, the code using dask.array.ufunc is shown. In this code, scipy.ndimage.rotate is parallelized:
import numpy as np
import dask.array as da
from scipy import ndimage

from lys import DaskWave
from lys.filters import FilterInterface

class Rotation2DFilter(FilterInterface):
"""
The array is rotated in the plane defined by the two axes given by the axes parameter using spline interpolation.

Args:
    angle(float): The rotation angle in degrees
    axes:(tuple of 2 ints): The two axes that define the plane of rotation.
"""

def __init__(self, angle, axes=(0, 1)):
    self._angle = angle
    self._axes = axes

def _execute(self, wave, *args, **kwargs):

    # This is simple function that rotate 2D image. Multi-dimensional data is not accepted.
    def f(x):
        return ndimage.rotate(x, self._angle, reshape=False)

    # da.gufunc automaticallly extend the function for multi-dimensional array.
    gumap = da.gufunc(f,
                    signature="(i,j)->(i,j)",
                    output_dtypes=wave.data.dtype,
                    vectorize=True,
                    axes=[tuple(self._axes), tuple(self._axes)],
                    allow_rechunk=True)

    # Apply function and return. Axes and note is not changed.
    data = gumap(wave.data)
    return DaskWave(data, *wave.axes, **wave.note)

def getParameters(self):
    if not hasattr(self, "_axes"):
        self._axes = (0, 1)
    return {"angle": self._angle, "axes": self._axes}